
Crete-Heat® Installation
Rectangular structures offer no real challenges in determining which direction you will work in laying the panels. If one of the dimensions is evenly divisible two or four, work along with that dimension.
Structures with the irregular exterior wall will require you to think a little about how best to proceed.
Assuming the top of the drawing is North, keeping cuts to a minimum should be your primary concern. The west to east dimension is 11 feet. The north-south dimension is 13 feet. In general, starting at the upper left-hand corner of the room is preferred as the panels work best left to right as you would read words on a page. In the above illustration, the numbers reflect the panel used with the proper layout to minimize waste.
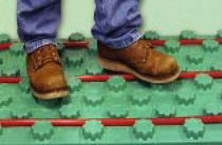
Fill material should be leveled as close to +/- 1/4" as is reasonable. One of the benefits of using the panel is that the 2' x 4' panels will float independently of the surrounding panels, thereby eliminating broken foam boards and trip hazards. You can also level as you go if you feel comfortable with the beginning grade of your fill material.
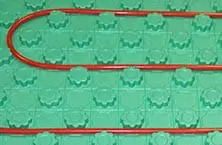
Using a box cutter or keyhole saw, cut the tongue portion of the interlock off of the 4' dimension going along the north wall as well as the tongue portion that will butt up against the west wall.